Managing Schedules
Schedules initiates the building of projects continuously. In this section, adding, modifying, and deleting of schedules are discussed.
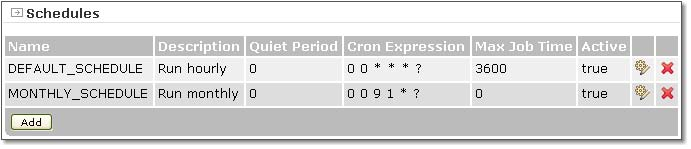
Clicking the Schedules link from the menu on the left will display the following page:
Adding Schedules
To add a schedule, follow these steps:
- Click the Add button below the list of schedules.
- Fill in the needed information in the Edit Schedules page shown below.
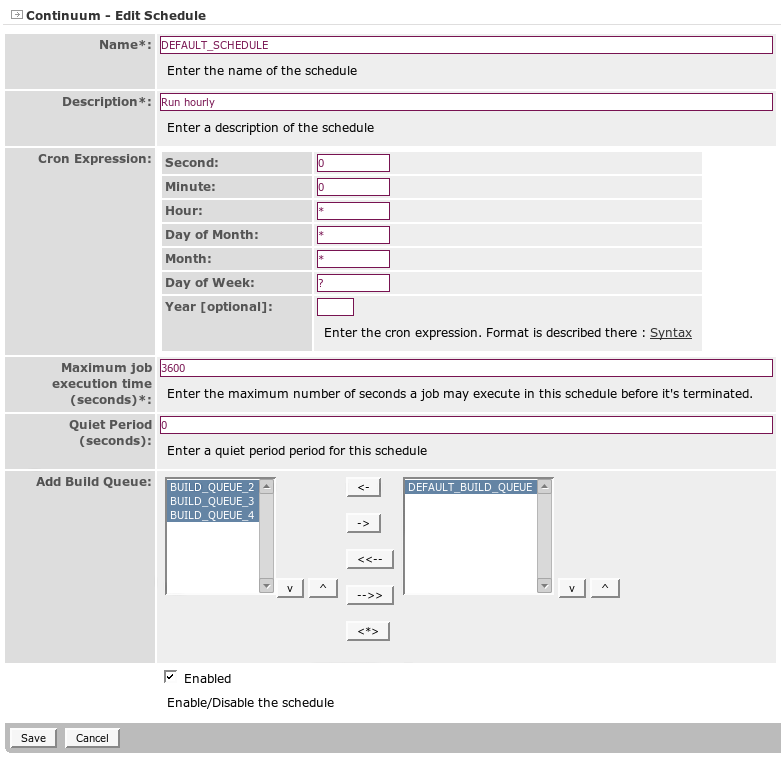
- Name The unique identifier of the schedule. This is a required field.
- Description Brief description of the configured schedule. This is a required field.
- Cron Expression Determines the exact time interval that the build schedule executes.
- Maximum job execution time (seconds) This sets the maximum time for a job to be executed. This is a required field.
- Quiet Period (seconds) This a setting that delays the build if there has been a commit in the defined number of seconds prior. This is useful when using CVS, since commits are not atomic and a developer might be committing midway through an update. It is not typically needed if using Subversion.
- Add Build Queue Move build queues from the left hand list box to the right hand list box by clicking the appropriate buttons in between the two list boxes. All build queues on the right hand list box will be attached to the schedule.
- Enabled When selected, scheduled build will be executed. []
- Click Save.
Editing Schedules
To edit a schedule, follow these steps:
- Click the edit icon which can be found to the right of the schedule.
- Modify the fields in the Edit Schedules page.
- Click Save.
Deleting Schedules
To delete a schedule, click the delete icon, the rightmost icon inline with the schedule to be deleted.
